DIY Mud Cloth Picture Frame
The beauty and patterns of mud cloth textiles are inspiring, however framing this beautiful fabric can be costly. With just a few tools and your favorite mud cloth fabric you can have an inexpensive framed wall piece in no time.
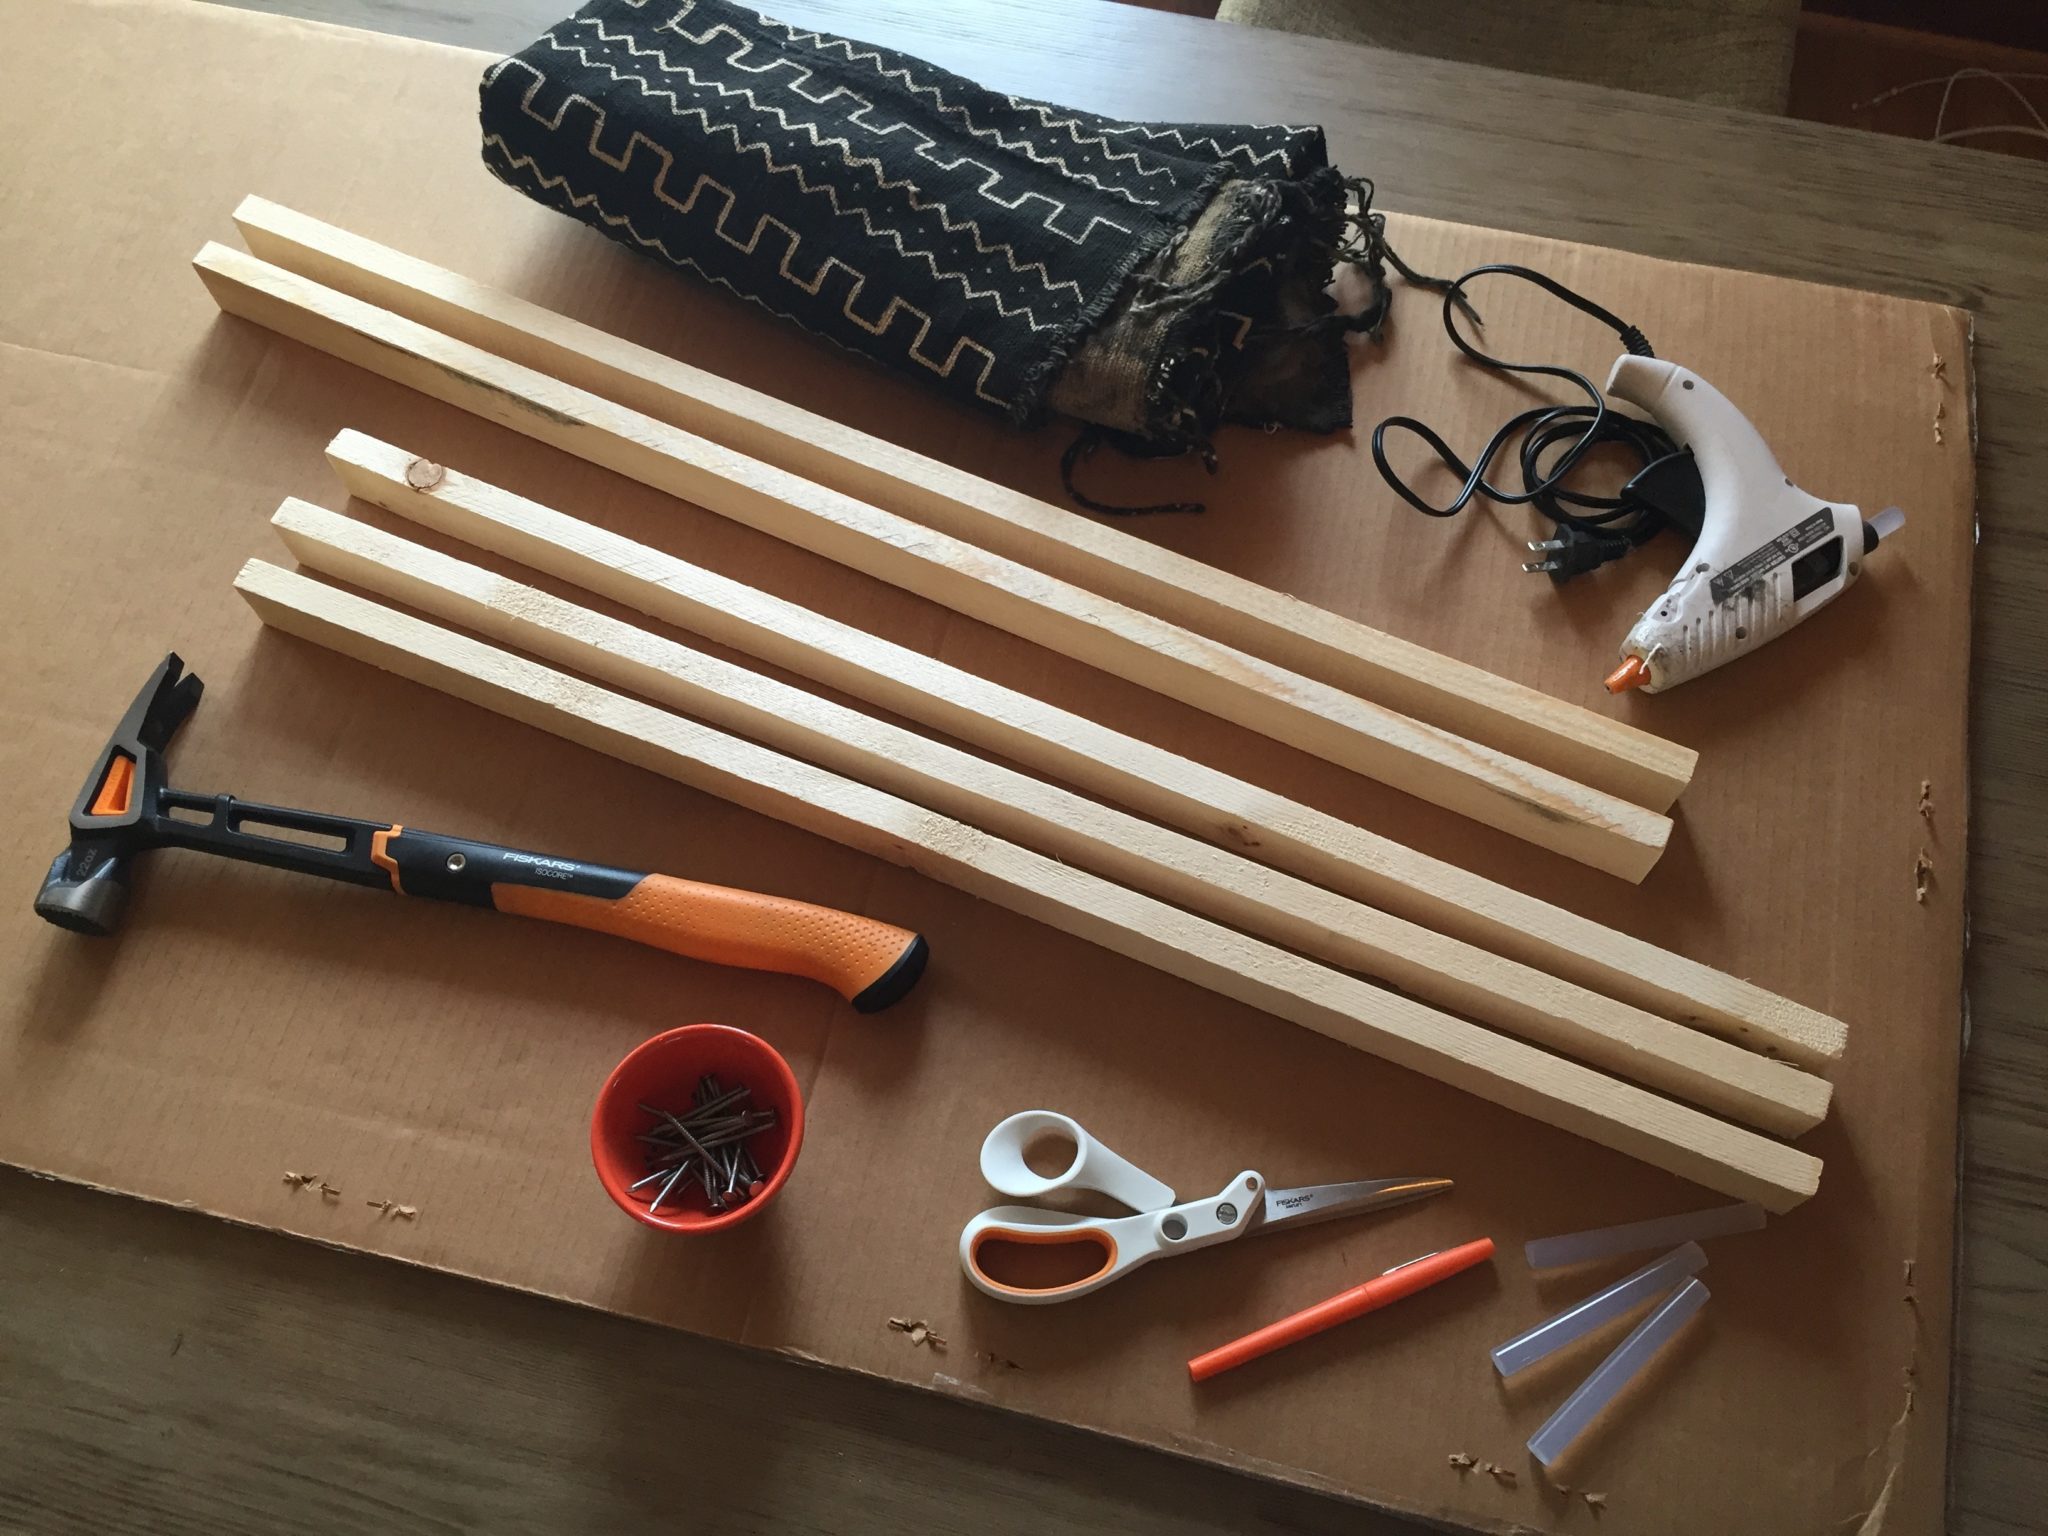
SUPPLY LIST
2 qty. pre-cut 1×2 board at 32”
3 qty. pre-cut 1×2 board at 30.5”
2” Nails
Mud-cloth fabric
Glue Gun & Sticks
Cardboard & Pen
TOOLS USED
IsoCore™ 22 oz Framing Hammer (16″)
Amplify® RazorEdge™ Fabric Shears (8″)
1. Measure the mud cloth fabric to determine how large the frame should be. You will want your frame to be a few inches smaller than the fabric so that the fabric can wrap around the frame. Don’t worry about any overlap – you’ll trim it later with shears. A 32” X 32” frame works well. You will need two boards that are 32” long, and three boards are 30.5” long. These pieces will make up the four sides of the frame, and one middle piece to help make the frame strong. Boards can be cut yourself or taken to a local hardware store to cut for a nominal fee.
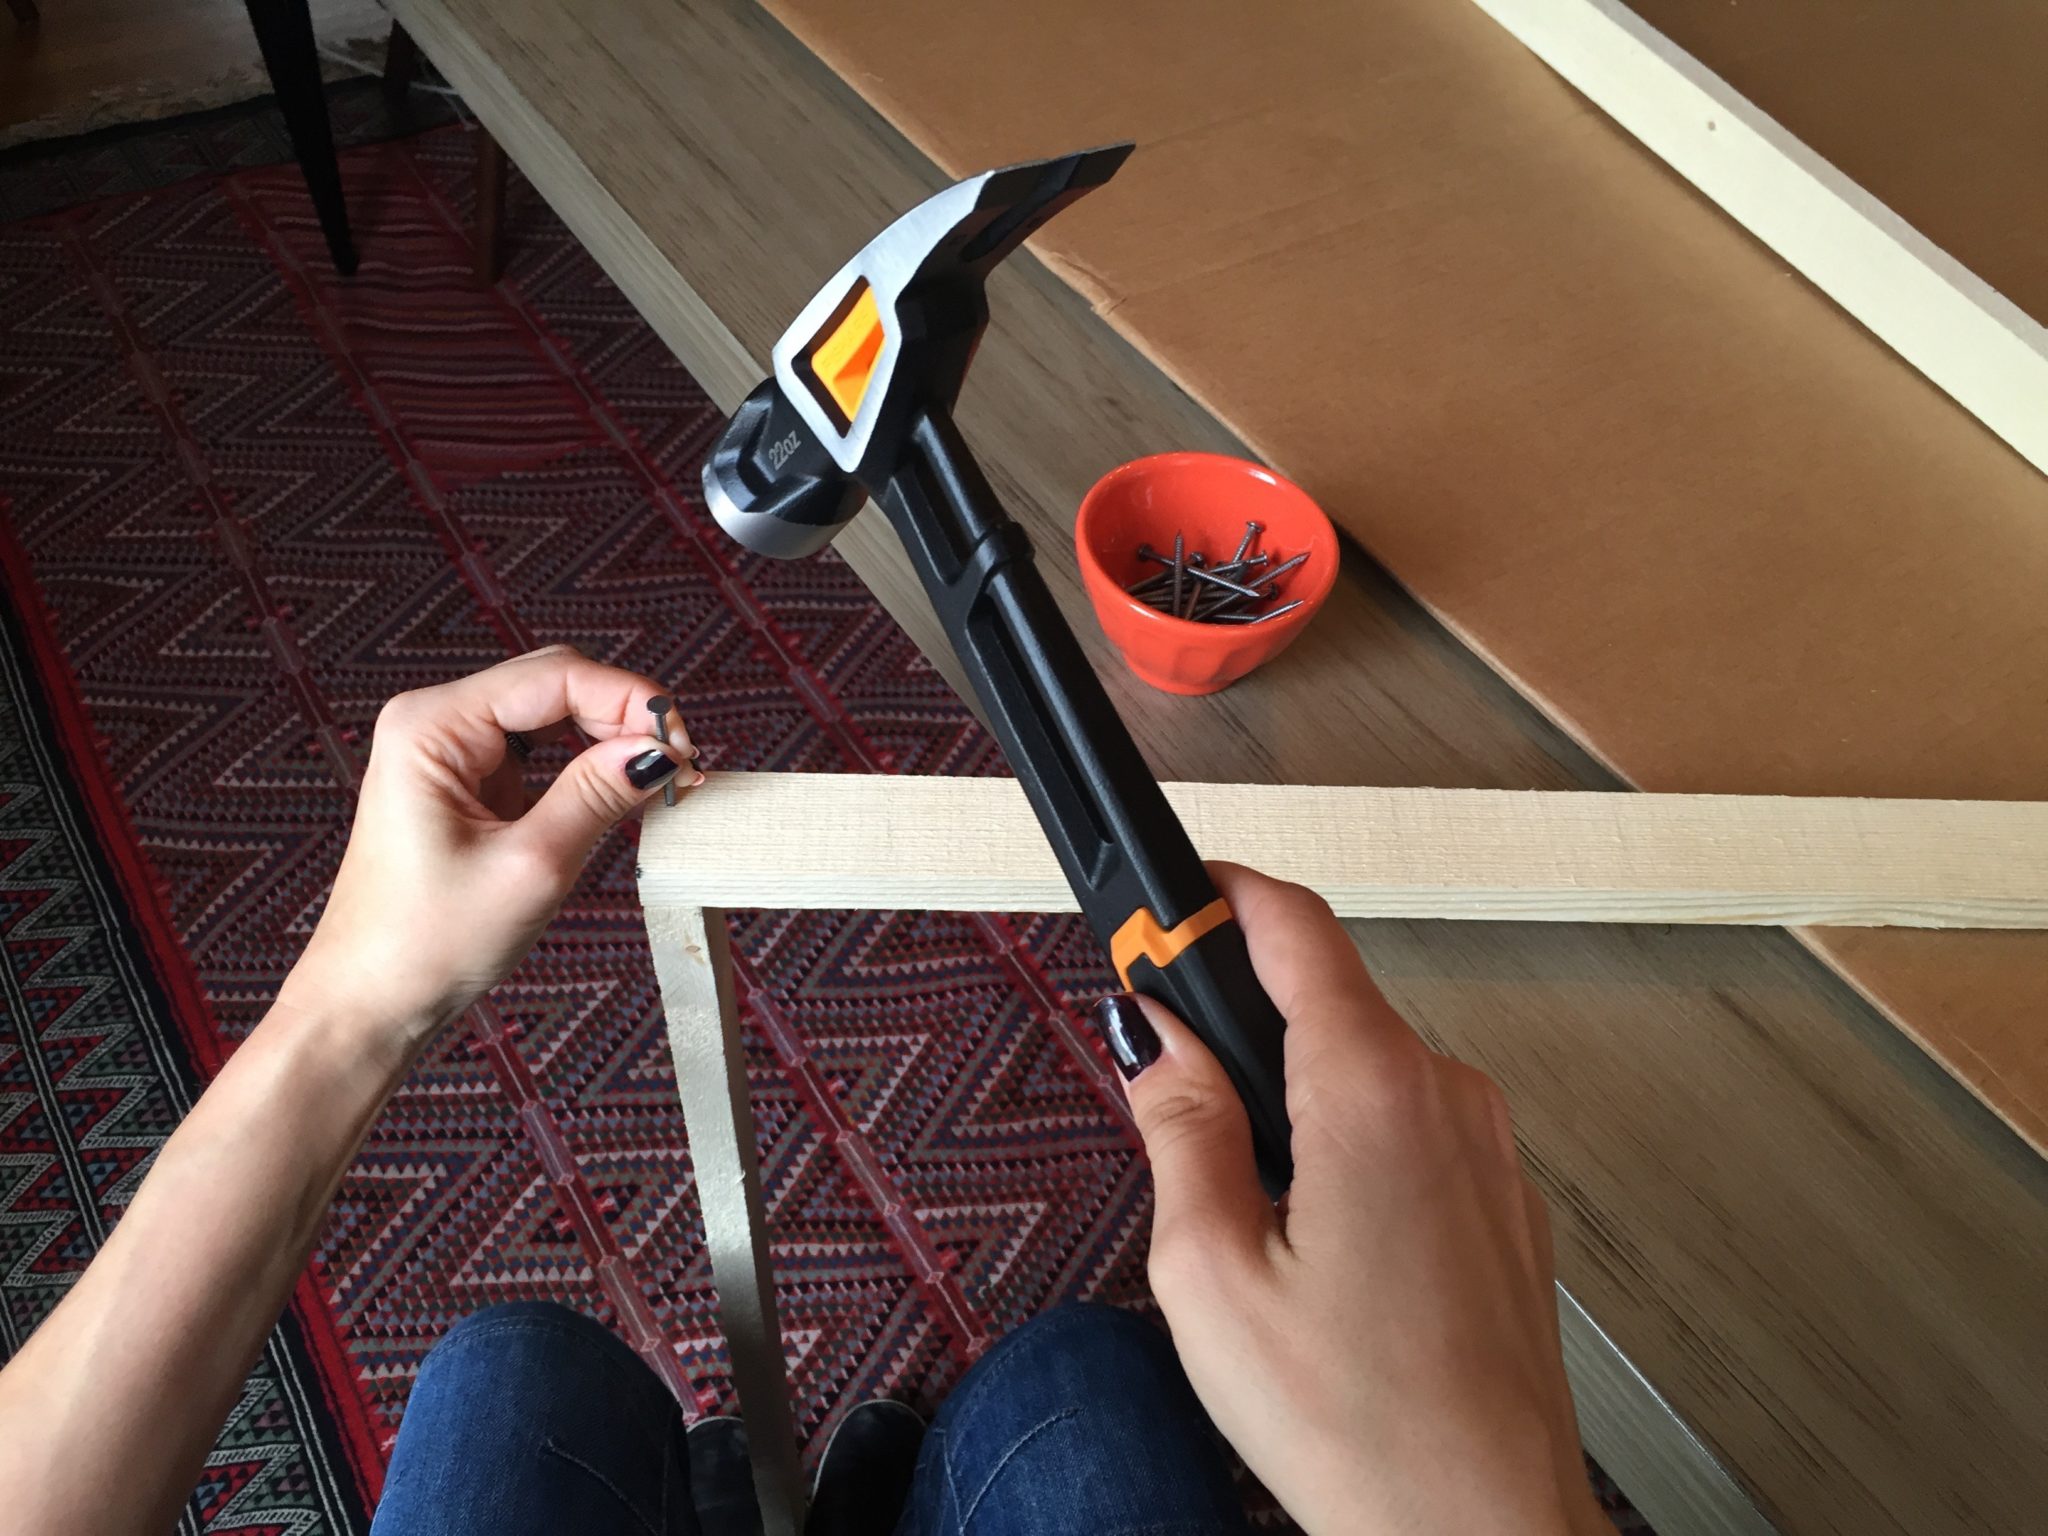
2. Use the IsoCore™ hammer to nail a 32” board into a 30.5” board at a right angle. For the strongest frame, use two 2” nails in each corner. If you are using a softer wood, like pine wood, the frame may split a little bit. A little bit of splitting in the wood is fine and will not affect the frame.
3. Continue to use the IsoCore hammer and 2” nails to create the frame. Hammer in the second and third 30.5” pieces of wood on the opposite end as your first piece of 30.5” wood, and in the center as a support beam. This will look like a capital letter “E” when you’re done.
4. Lay the second 32” board on the open end of the letter “E” and hammer this last board into place.
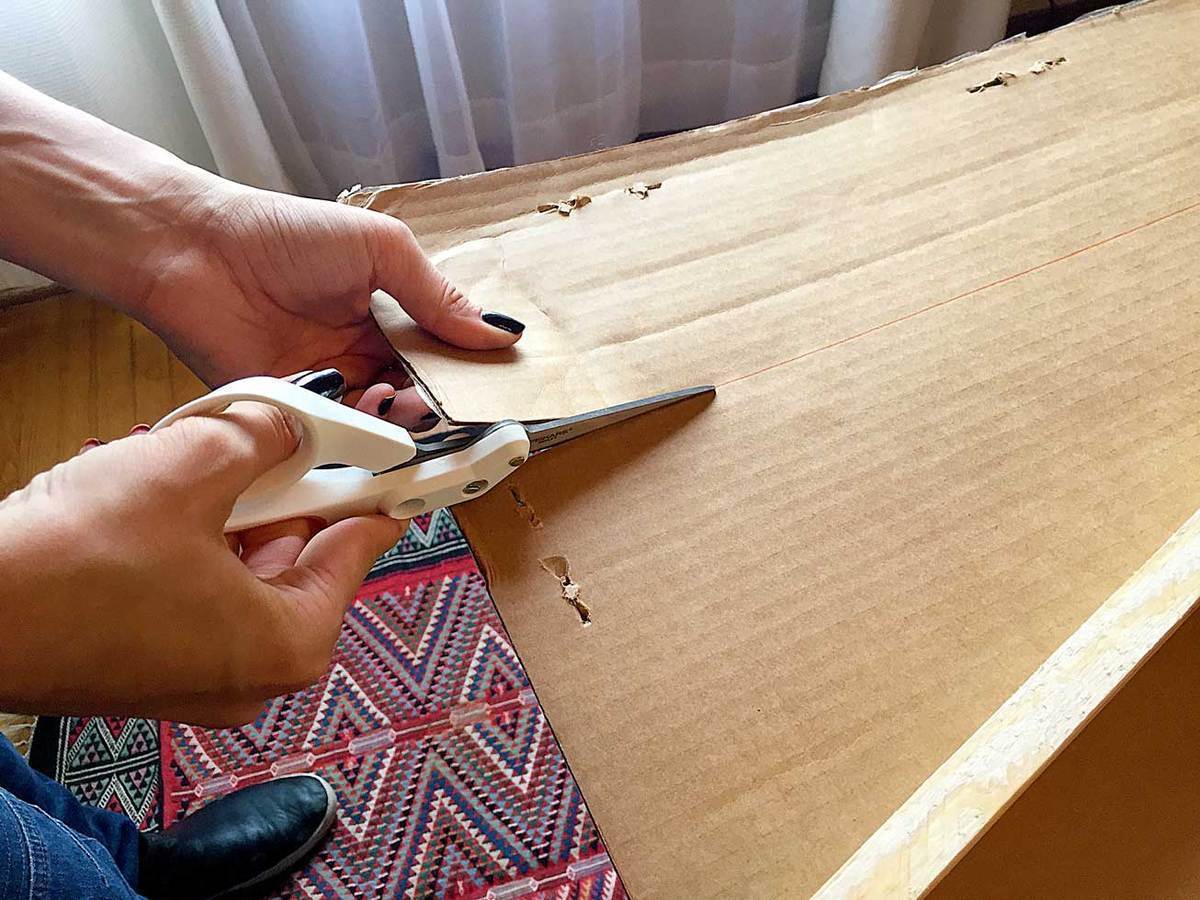
5. To make the frame stronger, place a sheet of upcycled cardboard onto the front of the frame to create a surface for the fabric to mount on. Lay the frame down and trace the frame on the cardboard.
6. Use Amplify® Mixed Media Shears to cut out the cardboard in the shape of the frame, these shears are designed to cut through thick materials and will ensure clean cuts each time. Trim any edges to get the cleanest line.
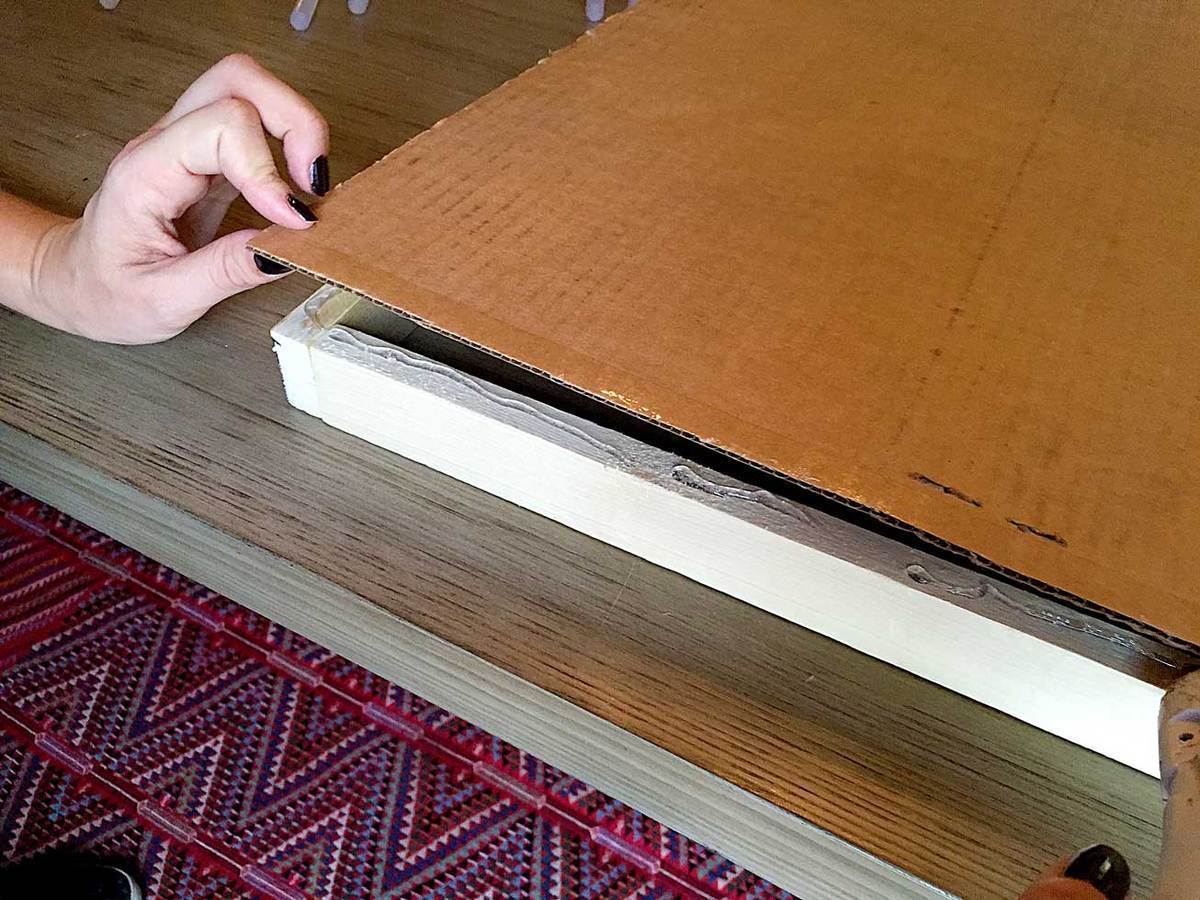
7. Use hot glue to attach the cardboard onto the front of the frame to secure it. This will also help keep the pattern symmetrical on the front.
8. Lay the mud cloth fabric over the frame and decide which part of the design you want to show on the frame. Make sure it’s straight before you trim.
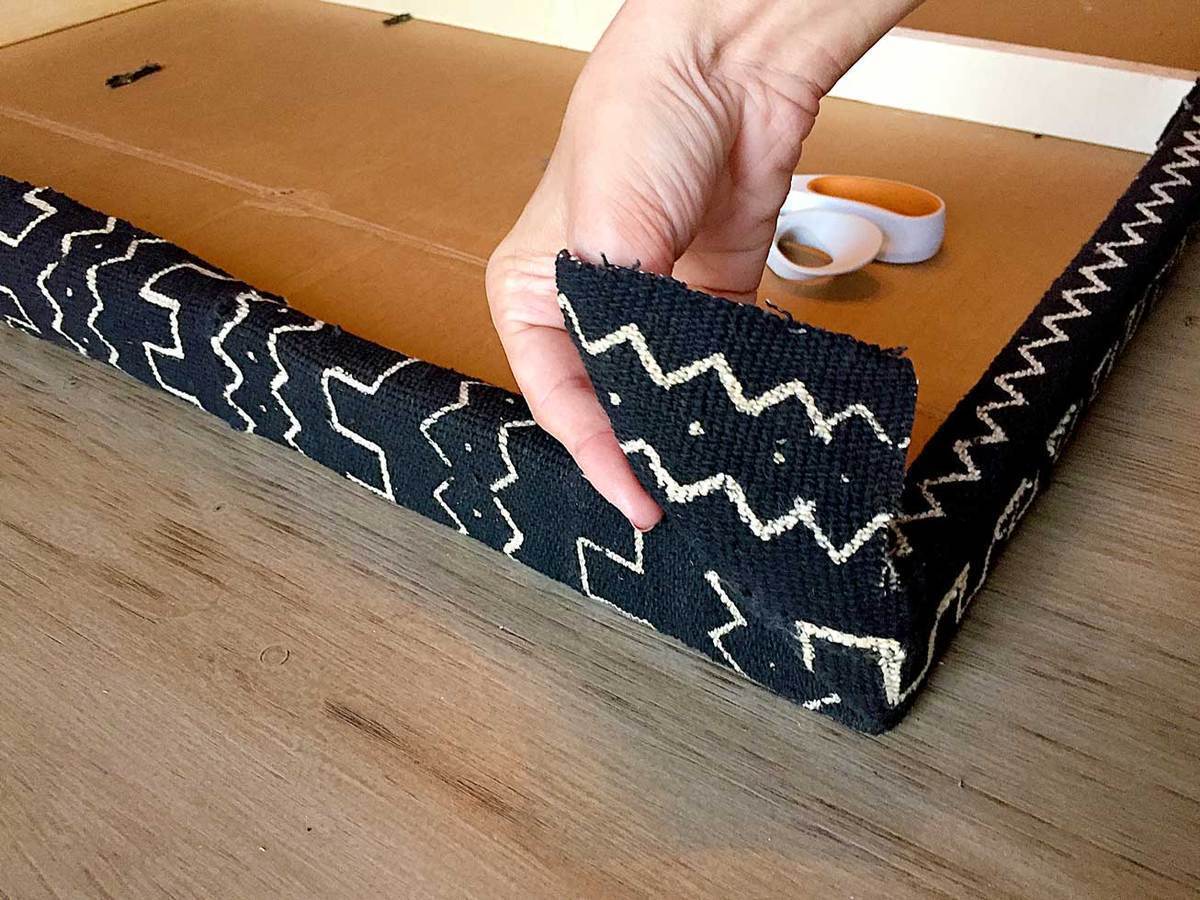
9. Flip the frame over and wrap the edges of the fabric around the frame. Use Amplify® Razoredge™ Fabric Shears to cut off the excess fabric, creating a nice clean cut on the thick, hand-woven fabric.
10. Use hot glue to adhere the fabric to the back of the frame. Fold the corners like you would if you were wrapping a present, and tuck the excess fabric down along the side. Glue into place. Use the hot glue gun to run a bead of glue along any edges of your fabric that are fraying on the back. It will help seal the edge and keep it from making a mess. Use your Amplify® Scissors to trim any stray strings. Hang or display to finish.
Read more at Fiskars.com.
Recent Portfolios

Hilton Garden Inn & Food Network

Parachute Home

Home Remodel for SoFi & HGTV